Wednesday, June 15, 2016

What I Did During My Spring Vacation.....................


Wednesday June 15th, 2016

All Pictures and Text Copyrighted 2016
Gary Fields

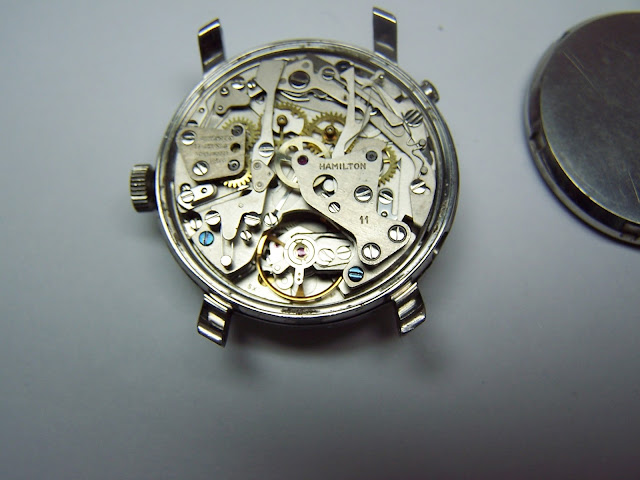
I recently acquired a large lot of watches. There were the usual bunch of quartz watches of all sizes and shapes, and then there were the mechanicals of all sizes and shapes. I had sat down for several evenings poring over all these treasures, pleased with what I had gotten, and discarding the junk. But one watch stood out to me because of its thickness and appearance. It was a Hamilton Automatic Chrono-matic watch. It was slightly damaged with one pusher badly mangled and faint scratch marks on the dial. Excited that I had for once a genuine chronograph, which I've never owned before, I set out to discover what it really was.


When I googled it, I found out it was a Caliber 11 watch, one of the first automatically wound chronographs first made in about 1969. It was highly prized as I saw by the prices they were going for on Ebay. Since I had no time to try and repair it as we were getting ready to take a vacation, I made the decision to sell it as it was on Ebay. The balance was good, albeit sluggish. It needed cleaning, but the balance being good made it a plus to sell for sure.


I placed it on Ebay at a starting price of $350, and a buy it now price of $1250. I was a little worried no one would touch it until some last hour sniping, but that was the chance you take. I posted it on May 9th, 2016. Two hours later I had a matching bid of $350 to start out with. Then, it progressed steadily each day for $5.00 or $10.00. We were already on our trip by then, and each day I checked and was thrilled to see interest and activity on it. Then, on the 7th day, I watched as it jumped in hundred to two hundred dollar increments. Auction over! Excitedly, I checked the winning bid, $721!!! It went more than I had hoped for, and it gave us more money for the trip.

I prepared it carefully in Wyoming, and sent it off, packed well, insured and tracked. It arrived four days later to its destination in California, and to a very happy new owner. He had it fixed and running in less than a week, and it looked great beside his other watch, a sister to that one. 

That watch was a great experience for me, and then, I remembered, a local business acquaintance once showed me one of many watches he had in his years of trading, and one of them was a chronograph.  I went hunting................................ 


Saturday, April 16, 2016

 Gary Fields 2016 ©

I would like to give a little background on this movement I am working on. I was contacted by a gentleman from the NAWCC forum, who wanted this clock to have some of Mark Butterworth's Butter bearings™ installed. In our back and forth, I determined that I could do the bearings up to the minute arbor. This would entail the winding arbor, second and third wheels, and the minute arbor wheel, a total of eight bearings. 

He also told me about IGUS self-lubricating plastic bearings, and wanted to see what I thought of them. I put in a request to a representative of the company, and was sent a 10 mm. diameter rod, 100 mm. long, and two other sleeve type bearings of which would not be applicable for what I am doing.

The 10 mm. rod was the smallest of which they had to offer. My plan is to reduce the diameter down to 1.79 mm.  I know, a lot of waste, but that is the size I need for the upper three wheels and possibly the pin lever also. I am using this size because I would install brass or bronze bushings of that size if this is unsuccessful. A backup plan, if you will!

Having installed Butter bearings™ before, I have been impressed with the results of how much they improve a clock's running, if done properly. The drawback for me is aesthetic. The bearings do jut out from the clock plates by a few millimeters, and I have always desired to use some form of retainer and/or housing to encase them in. Since I am retired, and have time on my hands (no pun intended), this is a perfect opportunity for me to try out what I have desired to do.

Pictured below is some of the work I have been at for the last 3 or 4 days. Trying this, trying that, measuring and re-measuring until I could be happy with the results. The winding arbor was reduced in size on the back of the movement, so it would fit the bearing intended for it. My first two attempts at creating a housing will go to the brass scrap pile, but I was pleased with the third attempt that I did today.


Using some harder brass from a drift punch, I turned down the outside diameter to .500 of an inch.


Checking the centering of the piece to my tailstock drill.


Center drilled then drilled with a #12 drill bit.


Next, the hole was enlarged with my homemade boring tool, to a diameter of .274". Here, the 903 Butter bearing™ has been press fit and checked for depth.


Bearing was removed, a blue marker used for layout dye coats the end of the retainer cap, measured and marked for three hole locations to mount to the mainspring retainer on the back of the movement.


First hole drilled


All three now drilled.


Retainer cap was parted off the stock at .068" thickness. Burrs removed with a reamer.


Retainer cap superglued to original  bar stock and first screw hole counter sunk for the screw head.. I did not notice at first, but I was off center just a tiny bit as you can see above. I didn't catch it until I counter sunk the screw head holes, and had one just a little closer to the edge than the others, but not enough to cause a problem. I'll use the odd one as a locator for the twelve o'clock position when I mount the retainer cap on the back.


Counter sinks completed.


After initial polishing of the brass. Bearing next to the steel spacer will go into the retainer cap.


Bearing in retainer cap, one screw for the retainer towards rear of photo.


Retainer screw is at 12:00 position. No slot has been filed yet.

Now that I have some of my machining steps down a little better, this will be located and installed on the mainspring retainer, which is mounted on the back of the movement. Next will be the front retainer cap and bearing for the winding arbor, a bigger task than what you would think it would be. Thanks for looking!


Tuesday, April 5, 2016

Gary Fields 2016 ©

Posted a video today to Youtube showing how to make pivots concentric to the wheel shaft. Veeeerry important thing to do when repairing a clock with small pivots and it is giving you trouble. Also, there is link below the video link, showing my Escape Wheel Truth Checker. Thanks for checking this out!............gf


Pivot Concentricity

Escape Wheel Truth Checker


Thursday, March 24, 2016

© 2016 Gary Fields

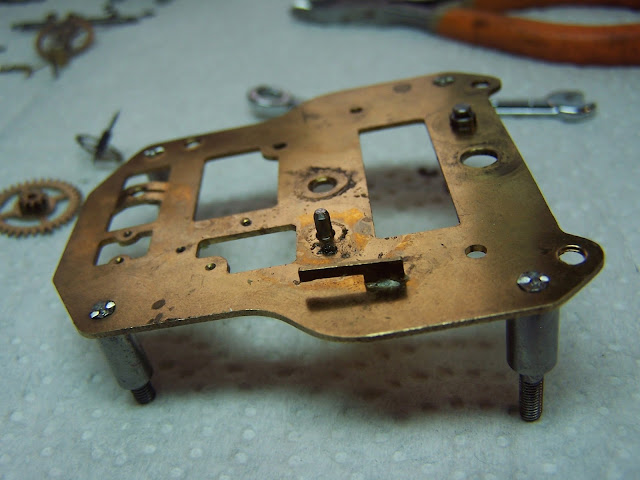
 Pivot hole examination of the plates 


Three encircled holes on the front plate show minor wear to major wear


Same pivot holes on back plate show very minor wear, but will be re-bushed as the front plate, so all will be equal. 


One of three pivot holes in front plate under microscopic view.


This one doesn't show as much wear, and is not as evident, but visible examination and turning in the light does show enough wear to warrant bushing.


My thoughts on bushing these holes would have been with some jewels, and would not be a problem, except for the higher cost. Second method would be to use bronze bushings, smooth broached, and burnishing of the pivots. I will check with the owner to see what he would like.

Top two photos taken with a Kodak EasyShare DX6490 camera. Lower three were taken with The Sharper Image Digital Microscope

Wednesday, March 23, 2016

Disassembly of Movement

Disassembly of movement:

© 2016 Gary Fields

This movement, from a very nice Daneker wall clock, came to me from a customer, wanting Butterbearings™ installed up and to the center wheel arbor. This will be a pictorial essay and diary of this work, and of other clock and watch movements as I work on them to repair, restore, and improve them with what I am able to do. I hope you enjoy this blog!........................gf 


Front of movement


Front mounting plate removed, exposing winding arbor and stopworks and hour and minute train


Stopworks exposed


Retainer clip removed


Hour wheel removed.


Stopworks removed


Back plate with mainspring retainer


Mainspring retainer and winding arbor removed


Exposing some of the inner wheel work


Spacing posts removed


Side view of minute arbor with tension spring, washers, and tension/retainer nut


Spring, washers and nut removed


Starting to remove minute arbor


Minute arbor removed out through front


Small pin lever bridge with screw retainer


View from top showing pin lever and balance wheel in place


Pin lever and balance removed


Movement nuts removed


Back movement plate removed showing wheels in place


Third wheel removal


Second wheel removed


Sixth wheel removed


Escape wheel removed


Fifth wheel removed


Center wheel removed


Minute wheel and retainer


Minute wheel retainer swung aside


Minute wheel removed


The movement in her bare essentials. Trip to the ultrasonic is next.


Things noted during tear down:

> Lots of dried semi-hard grease, some exhibiting verdigris development albeit not serious or in large size.
> Excessive slop in pivots, especially up past center wheel, where there is less force on them. Dried oil exacerbates this problem.
> No visible damage or wear (gouging, grooves, pitting) noted on any pivots.
> No nickel plating observed on any steel surface
> Wheel teeth all appear to be in excellent shape.

Post ultrasonic cleaning:

> Worn pivot holes easily visible, especially in upper end wheels. Will take some pictures tomorrow against white background, easily shows the wear.

> Ultrasonic cleaning accomplished using 1 1/2 gal. of Walmart ammonia cleaner, 1 pint of Pine Sol cleaner. Mildly heated, with clean time of 5 minutes in an L&R Quantrex 280H ultrasonic cleaner. Rinsed in reverse osmosis water (less stains on brass), and dried by forced air heat.